3. Getting started
In the previous chapter, you learned how to install and start deegree webservices. In this chapter, we will introduce the deegree service console and learn how to use it to perform basic tasks such as downloading and activating example configurations. In deegree terminology, a complete configuration for a deegree instance is called “deegree workspace”.
The following chapters describe the structure and the aspects of the deegree workspace in detail. For the remainder of this chapter, just think of a deegree workspace as a directory of configuration files that contains a complete configuration for a deegree webservice instance. You may have multiple deegree workspaces on your machine, but only a single workspace can be active.
3.1. Accessing deegree’s service console
The service console is a web-based administration interface for configuring your deegree webservices installation. If deegree webservices are running on your machine, you can usually access the console from your browser via http://localhost:8080
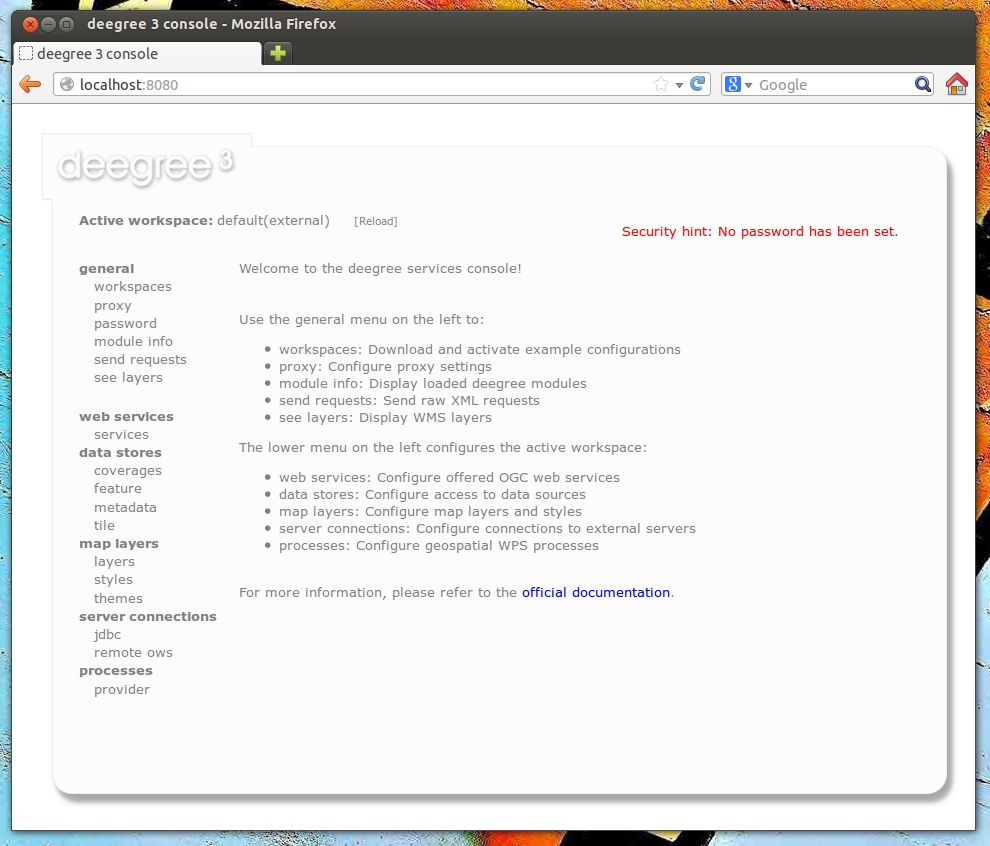
deegree webservices administration console
Tip
If you’re not running the ZIP version, but deployed the WAR version into a web container, you most probably will have to use a different URL for accessing the console, e.g. http://localhost:8080/deegree-webservices-3.3.19. The port number and webapp name depend on your installation/deployment details.
Tip
You can access the service console from other machines on your network by exchanging localhost with the name or IP address of the machine that runs deegree webservices.
For the remainder of the chapter, only the general section is relevant. The menu items in this section:
- workspaces: Download and activate example configurations
- proxy: Configure network proxy settings
- password: Set a password for accessing the service console
- module info: Display loaded deegree modules
- send requests: Send raw OGC web service requests
- see layers: Display WMS layers
3.1.1. Downloading and activating example workspaces
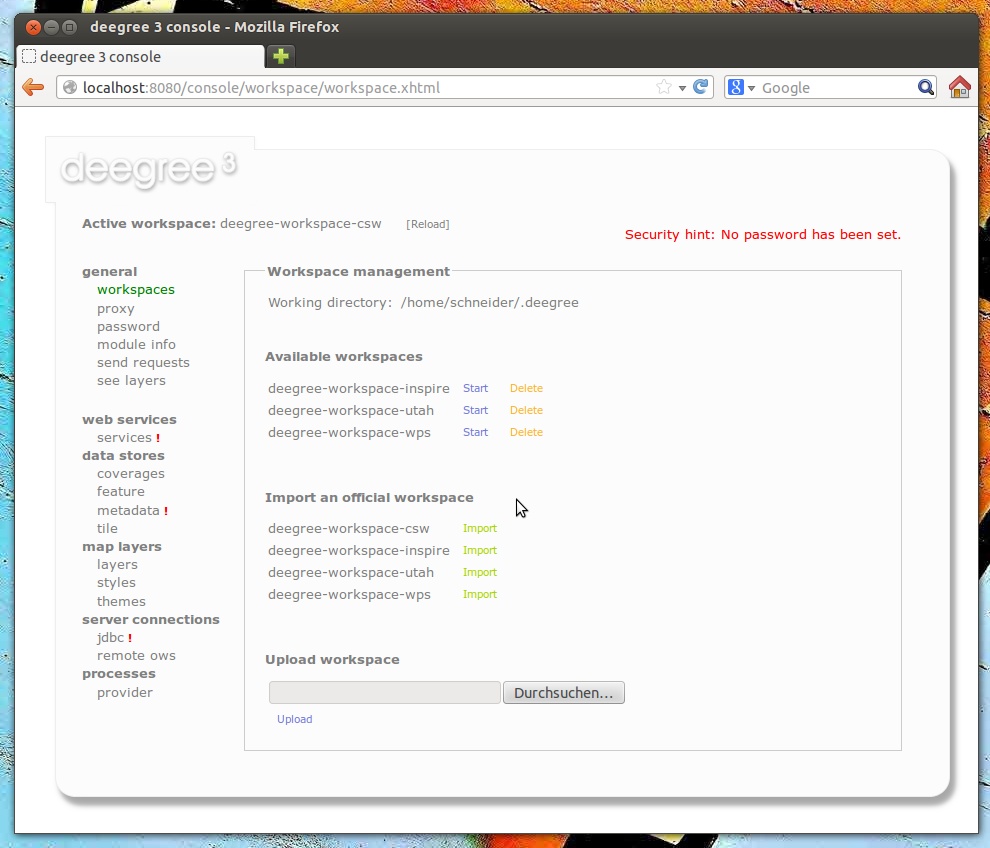
Click the workspaces link on the left:
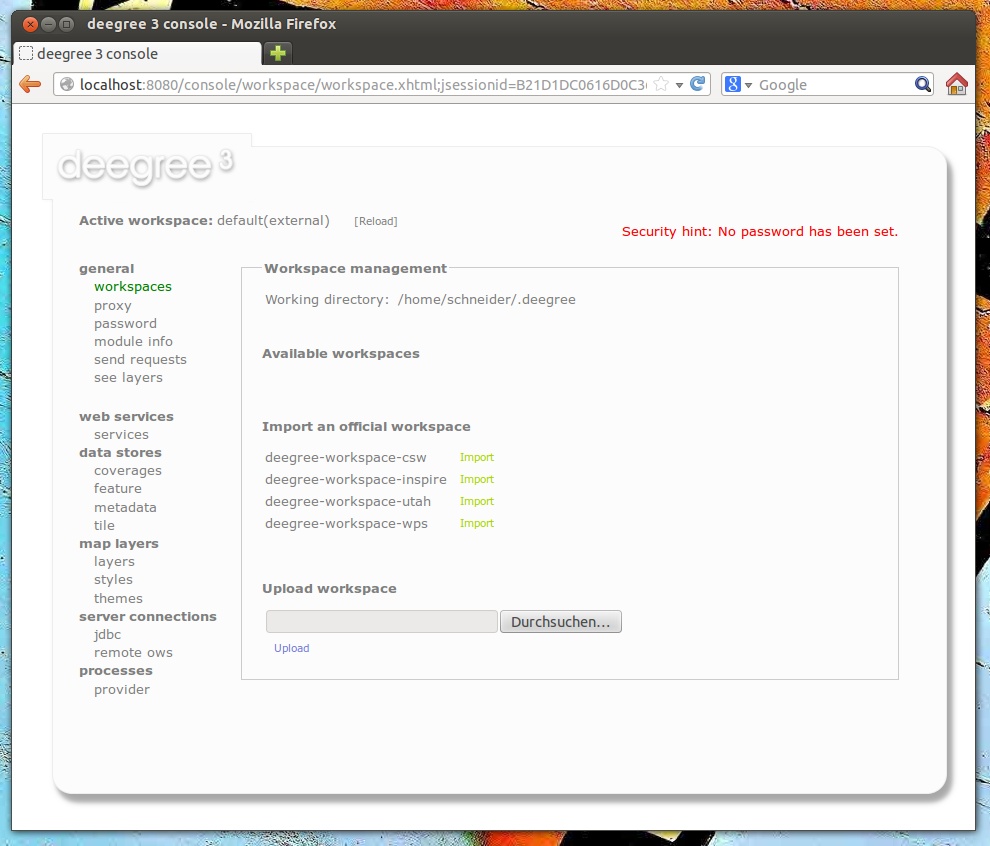
Workspaces view
The bottom of the workspaces view lists example workspaces provided by the deegree project. You should see the following items:
- deegree-workspace-inspire: Example workspace 1: INSPIRE Network Services
- deegree-workspace-utah: Example workspace 2: Utah Webmapping Services
- deegree-workspace-csw: Example workspace 3: An ISO Catalogue Service setup
- deegree-workspace-wps: Example workspace 4: Web Processing Service demo
Tip
If the machine running deegree webservices uses a proxy to access the internet and you don’t see any available example configurations, you will probably have to configure the proxy settings. Ask your network administrator for details and use the proxy link to setup deegree’s proxy settings.
If you click Import, the corresponding example workspace will be fetched from the artifact repository of the deegree project and extracted in your deegree workspaces folder. Depending on the workspace and your internet connection, this may take a while (the Utah workspace is the largest one and about 70 MB in size).
After downloading has completed, the new workspace will be listed in section “Available workspaces”:
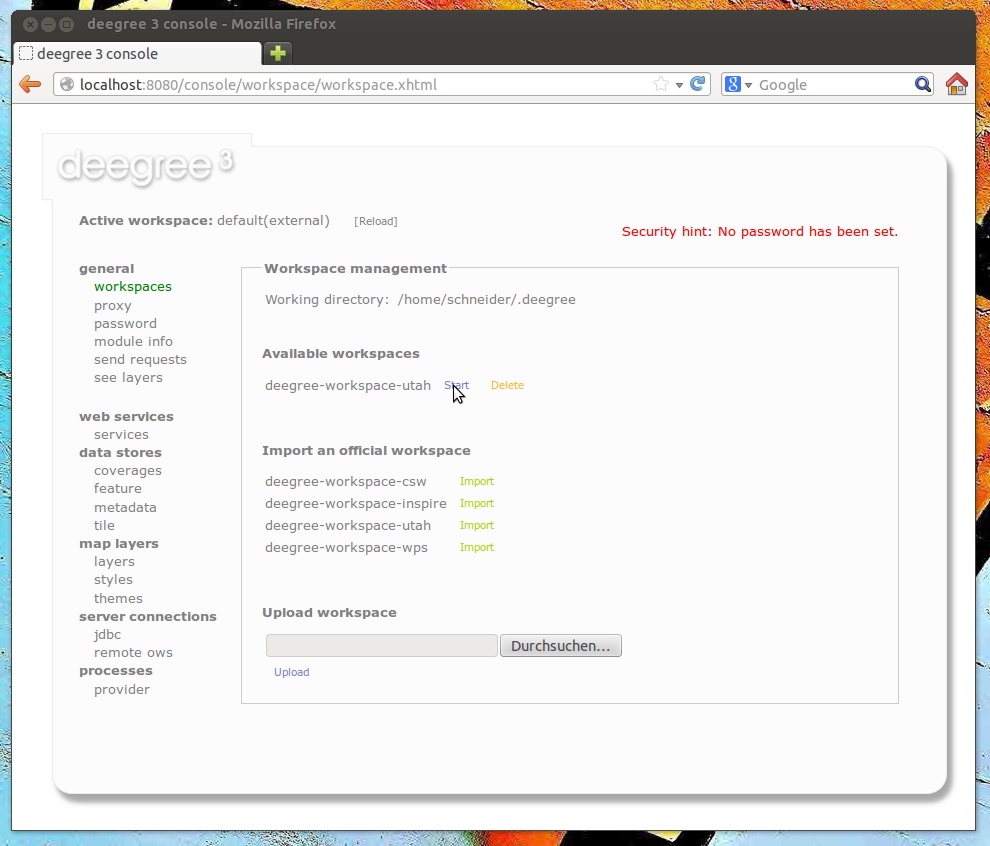
Downloaded, but inactive workspace
You can now activate the downloaded workspace by clicking Start. Again, this may take a bit, as it may require some initialization. The workspace will be removed from the list of inactive workspaces and displayed next to “Active workspace:” (below the deegree logo). Your deegree instance is now running the configuration that is contained in the downloaded workspace.
3.2. Example workspace 1: INSPIRE Network Services
This workspace is a basic INSPIRE View and Download Services setup. It contains a transactional WFS (2.0.0 and 1.1.0) configured for all Annex I Data Themes and a WMS (1.3.0 and 1.1.1) that is configured for three layers from three Annex I Data Themes. The workspace contains some harmonized dutch base data for Administrative Units, Cadastral Parcels and Addresses. The WFS is configured to behave as an INSPIRE Download service (Direct Access) that delivers the base data as valid, harmonized INSPIRE GML and supports rich querying facilities.
Tip
This workspace is pre-configured to load harmonized INSPIRE features from GML files into memory, but can easily be adapted to use PostGIS, Oracle Spatial or Microsoft SQL Server databases as storage backend (see Auto-generating a mapping configuration and tables and SQL feature store).
After downloading and activating the “deegree-workspace-inspire” workspace, you can click the see layers link, which opens a simple map client that displays a base map (not rendered by deegree, but loaded from the OpenStreetMap servers).
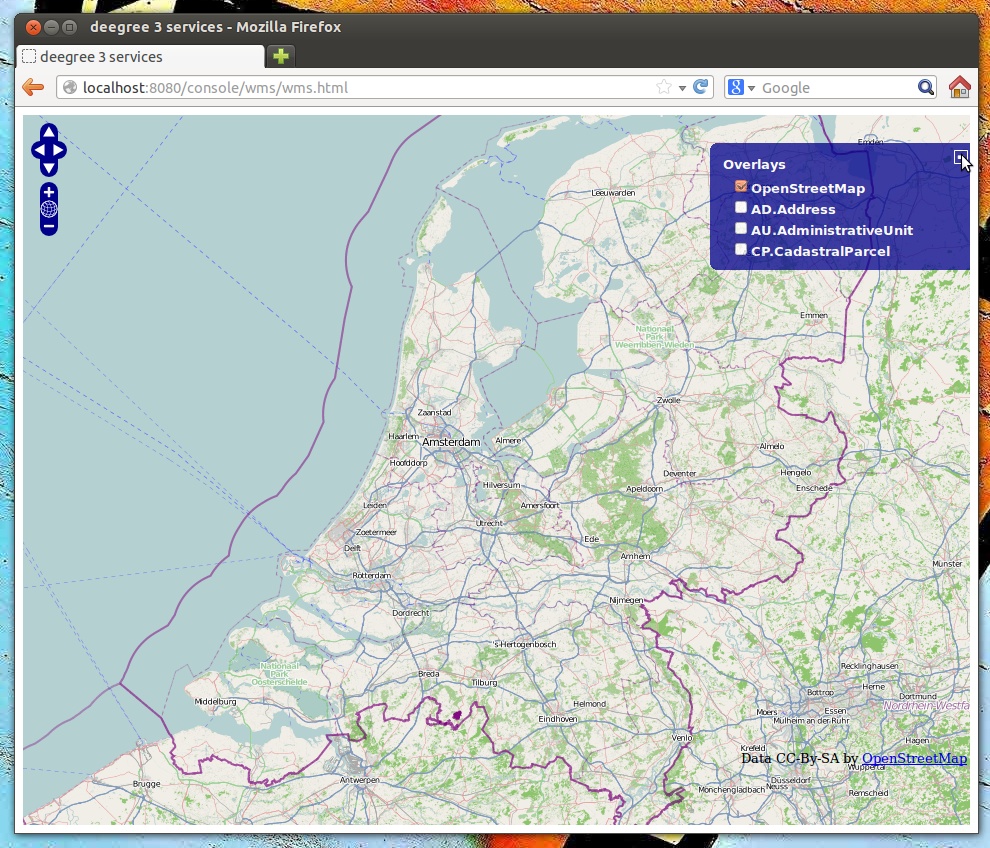
Map client showing base map
Click the + on the right to see a list of available layers. You can now tick the INSPIRE layers offered by the deegree WMS.
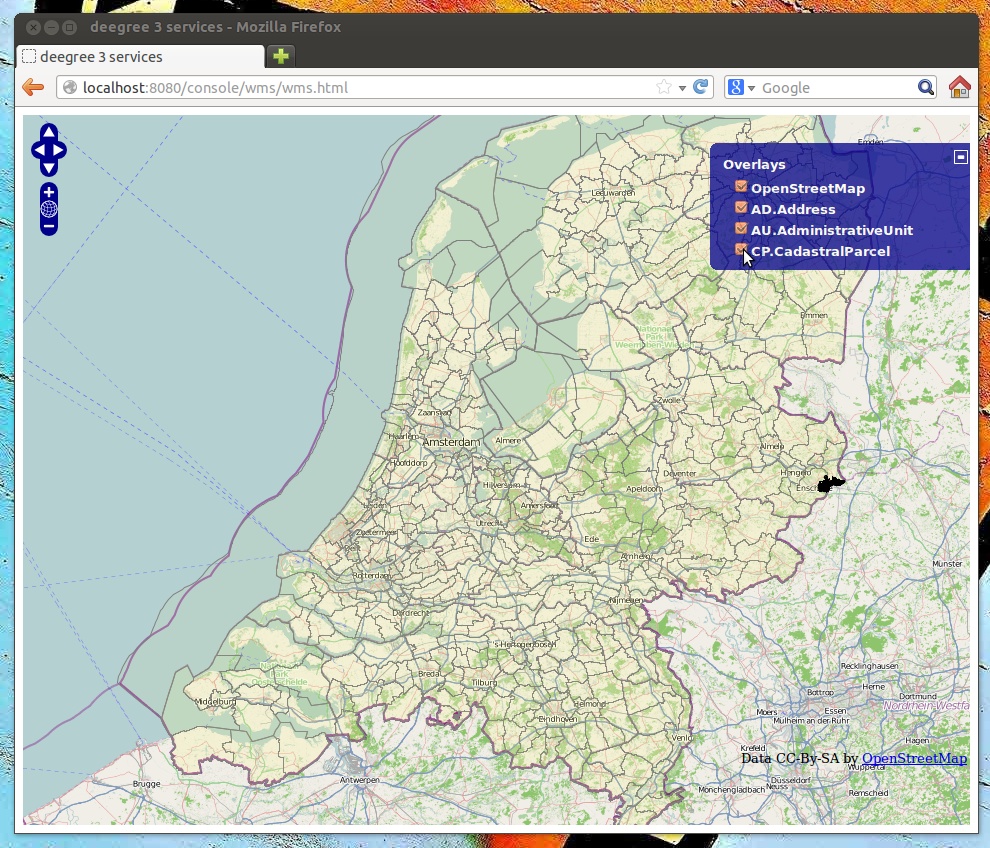
INSPIRE layers rendered by the deegree WMS
Tip
The map client is based on OpenLayers. Drag the map by holding the mouse button and moving your mouse. Zoom using the controls on the left or with the mouse wheel. Alternatively, you can open a zoom rectangle by holding the SHIFT key and clicking the mouse button in the map area.
Note that nothing will be rendered for layer AD.Address, as the configured storage (memory) doesn’t contain any Address features yet. However, the workspace ships with example WFS-T requests that can be used to insert a few harmonized INSPIRE Address features. Use the send requests link in the service console to access the example requests (you may need to go back in your browser first):
Use the third drop-down menu to select an example request. Entries Insert_200.xml or Insert_110.xml can be used to insert a small number of INSPIRE Address features using WFS-T insert requests:
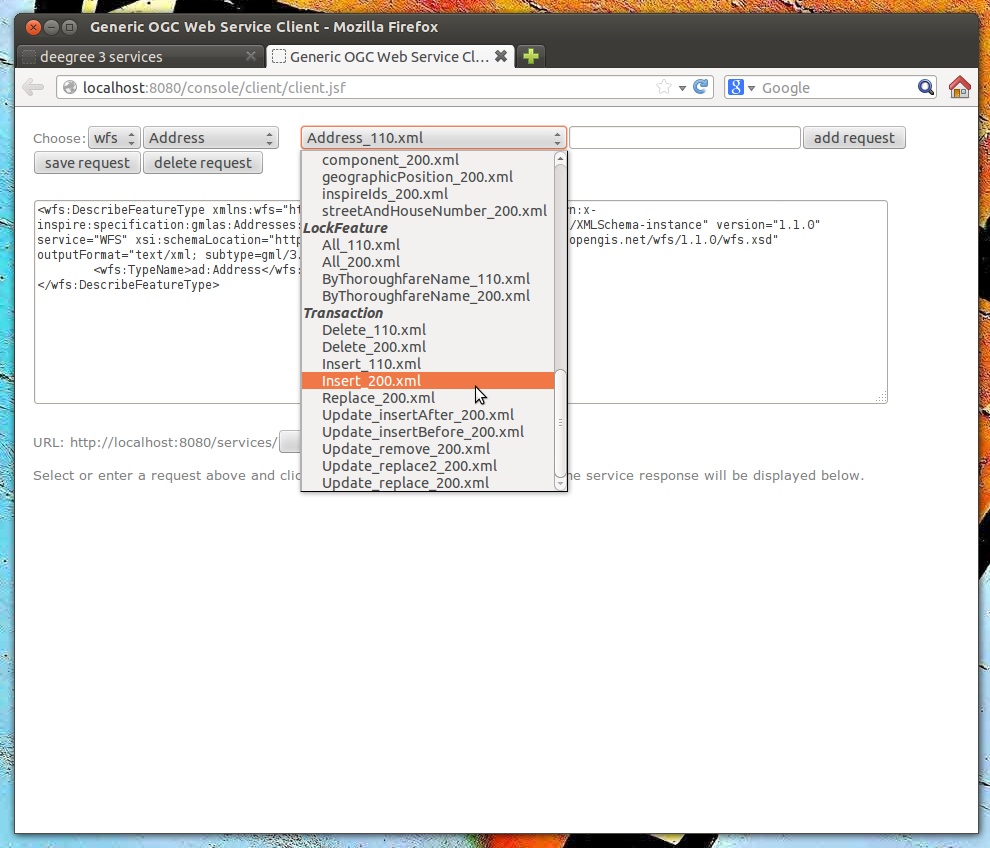
WFS-T example requests
Click Send to execute the request. After successful insertion, the internal storage contains a few addresses, and you may want to move back to the layer overview (see layers). If you activate layer AD.Address this time, the newly inserted features will be rendered by the deegree WMS (look for them in the area of Enkhuizen):
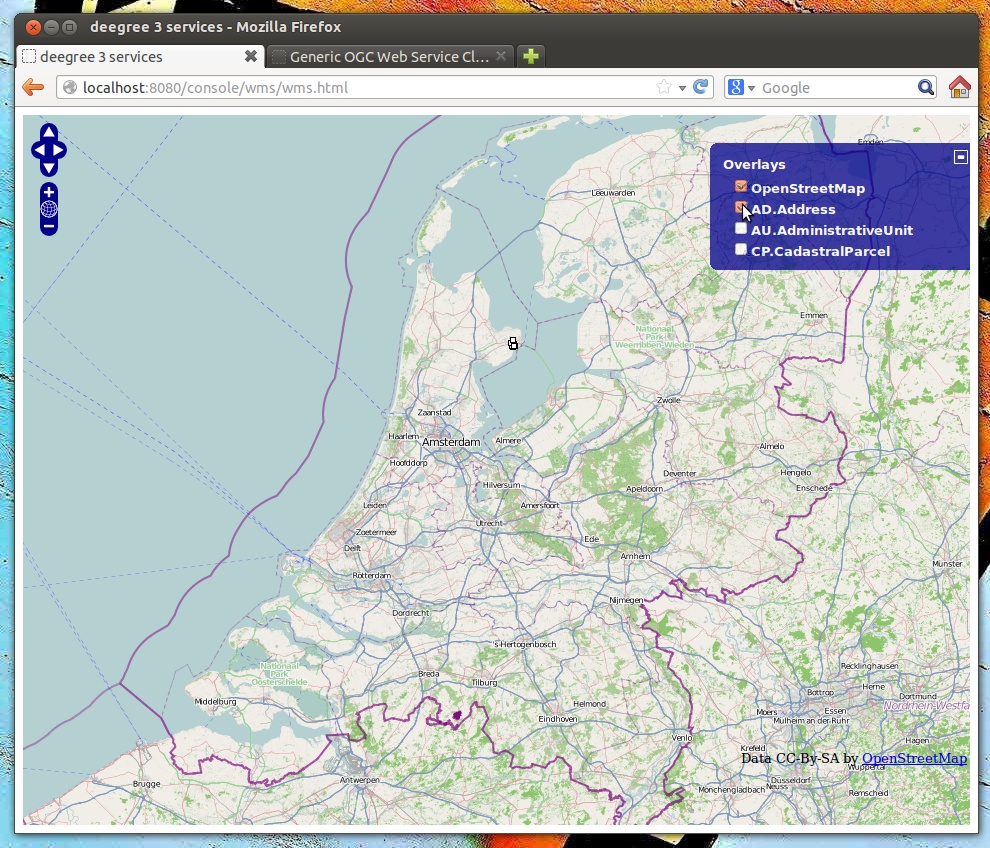
Ad.Address layer after insertion of example Address features
The example requests also contain a lot of query examples, e.g. requesting of INSPIRE Addresses by street name:
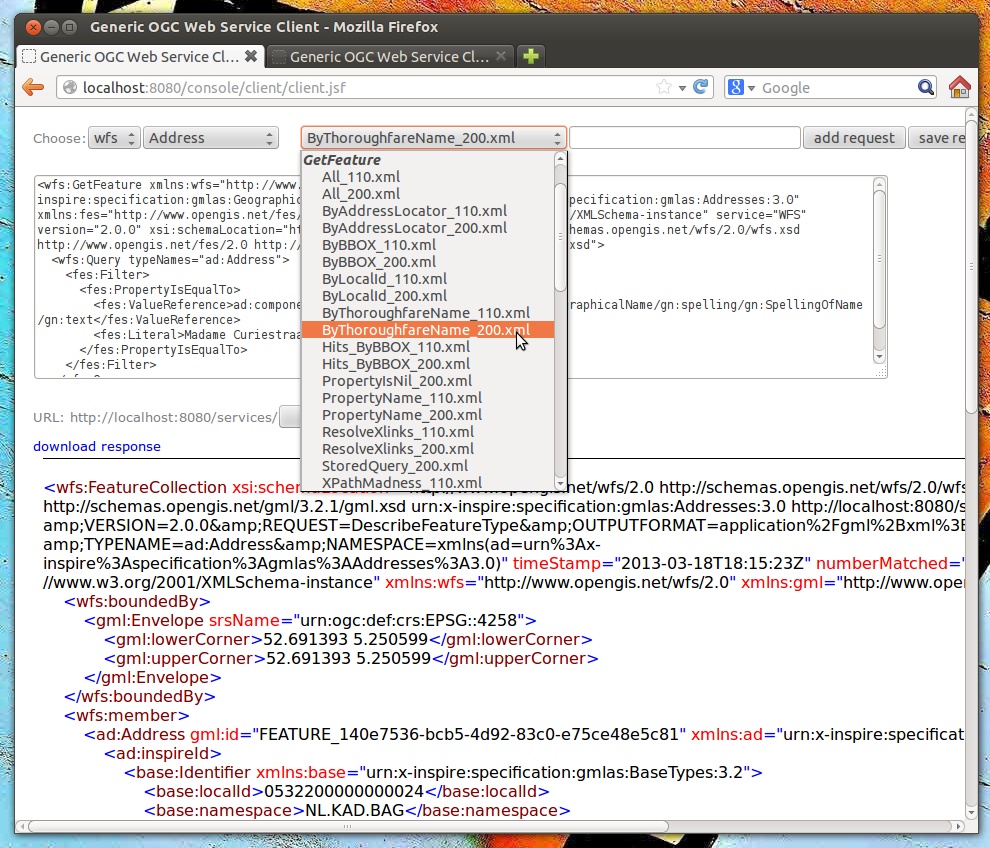
WFS query examples
Tip
This workspace is a good starting point for implementing scalable and compliant INSPIRE View and/or Download Services. It can easily be adapted to use PostGIS, Oracle Spatial or Microsoft SQL Server databases as storage backend (see Auto-generating a mapping configuration and tables and SQL feature store). Other things you may want to adapt is the configuration of Map layers, the Map styles or the reported Metadata.
Tip
You can also delete features using WFS transactions. After deletion, they will not be rendered anymore as WMS and WFS operate on the same feature store.
3.3. Example workspace 2: Utah Webmapping Services
The Utah example workspace contains a web mapping setup based on data from the state of Utah. It contains a WMS configuration (1.3.0 and 1.1.1) with some raster and vector layers and some nice render styles. Raster data is read from GeoTIFF files, vector data is backed by shapefiles. Additionally, a WFS (2.0.0, 1.1.0 and 1.0.0) is configured that allows to access the raw vector data in GML format.
After downloading and activating the “deegree-workspace-utah” workspace, you can click on the see layers link, which opens a simple map client that displays a base map (not rendered by deegree, but loaded from the OpenStreetMap servers).
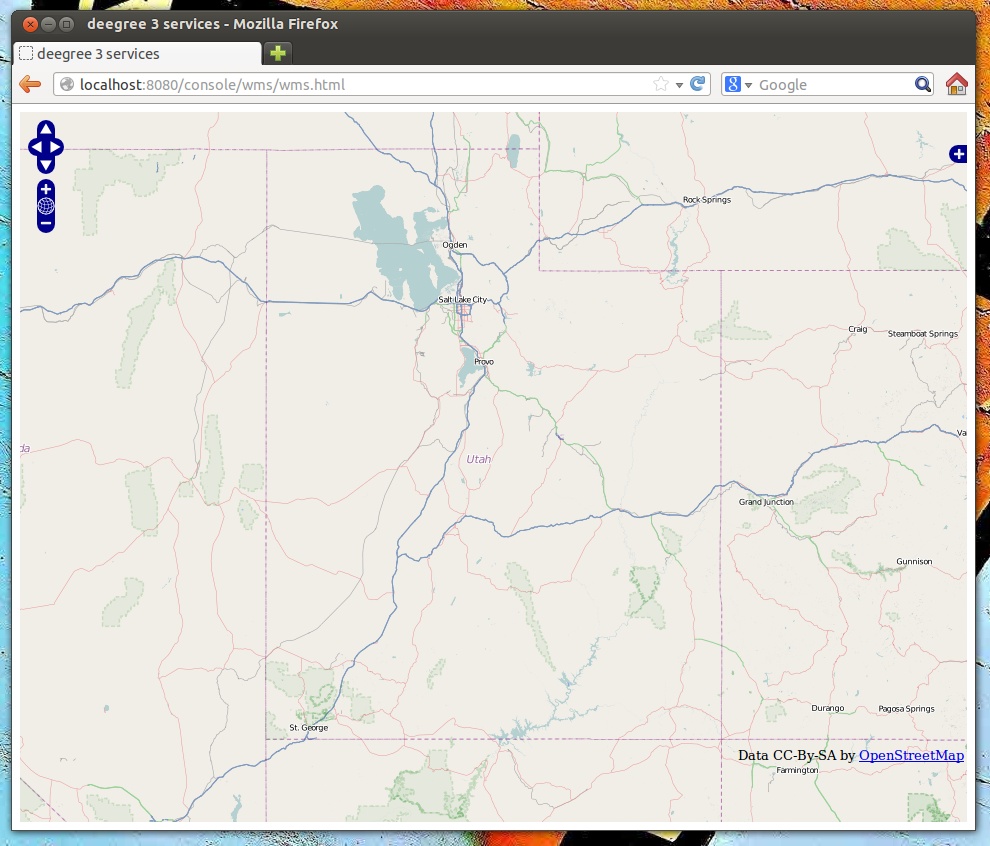
Map client showing base map
Click the + on the right to see a list of available layers. Tick the ones you want to see. They will be rendered by your deegree webservices instance.
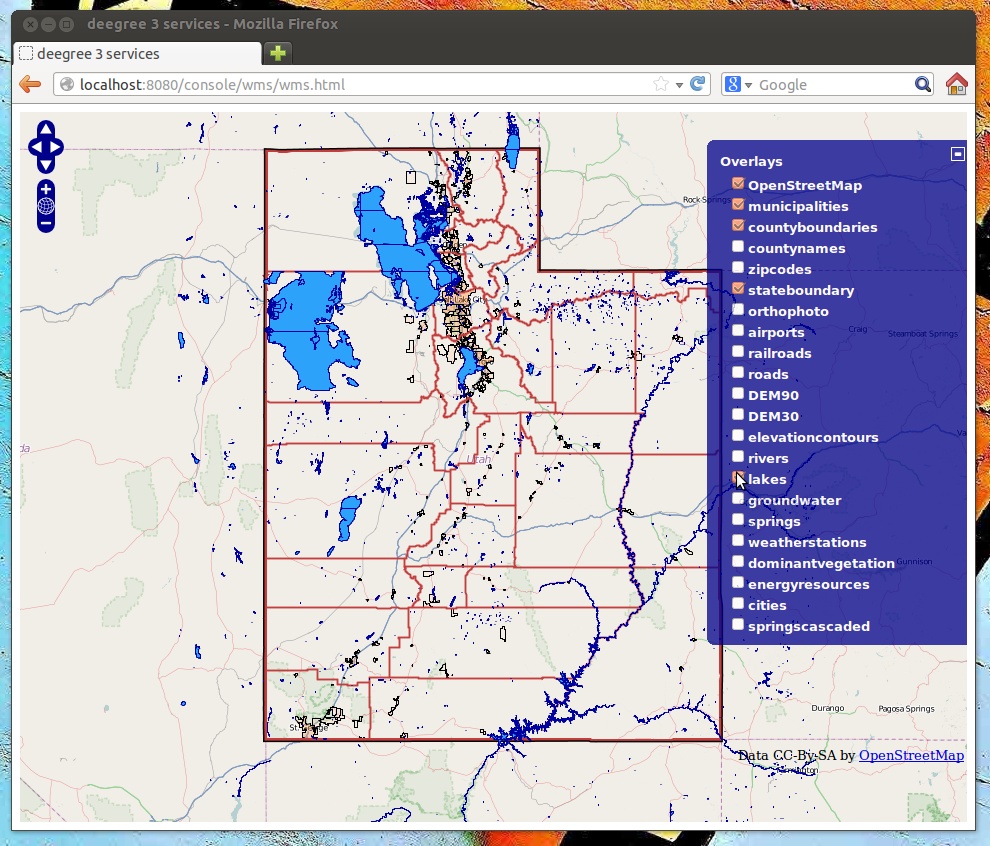
Selecting WMS layers to be displayed
Tip
The map client is based on OpenLayers. Drag the map by holding the mouse button and moving your mouse. Zoom using the controls on the left or with the mouse wheel. Alternatively, you can open a zoom rectangle by holding the SHIFT key and clicking the mouse button in the map area.
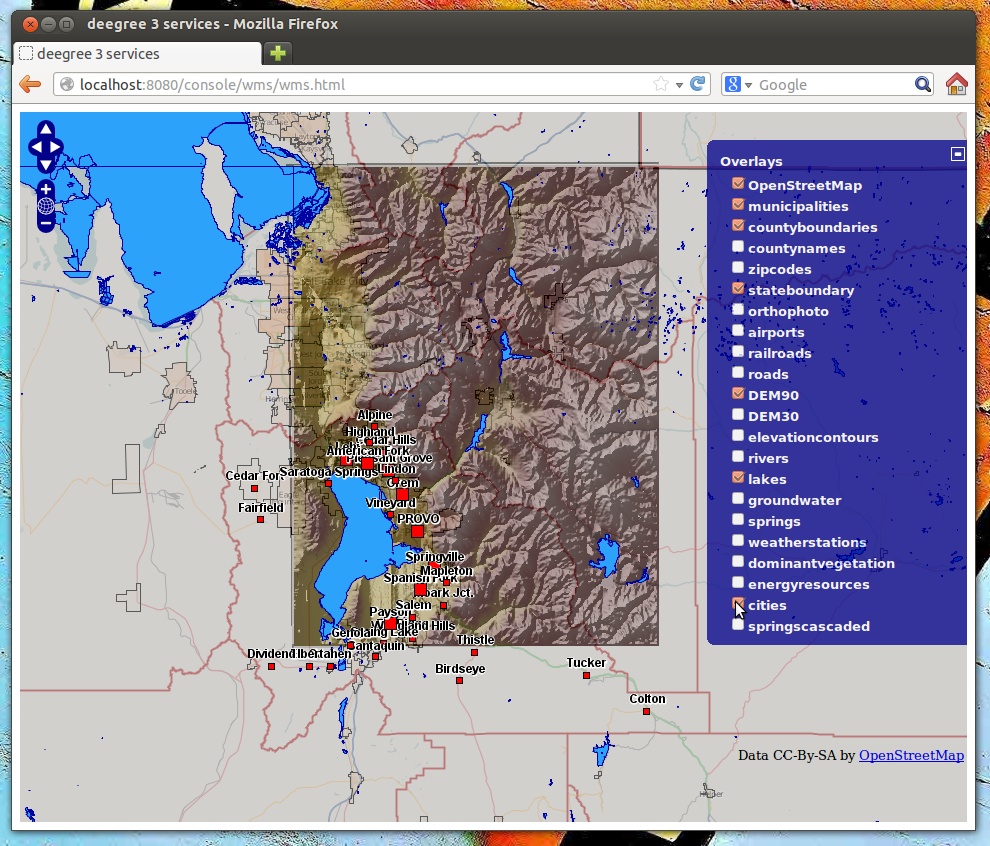
Exploring Utah layers
In order to send requests against the WFS, you may use the send requests link in the service console (you may need to go back in your browser first). A simple interface for sending XML requests will open up. This interface is meant for accessing OGC web services on the protocol level and contains some reasonable example requests.
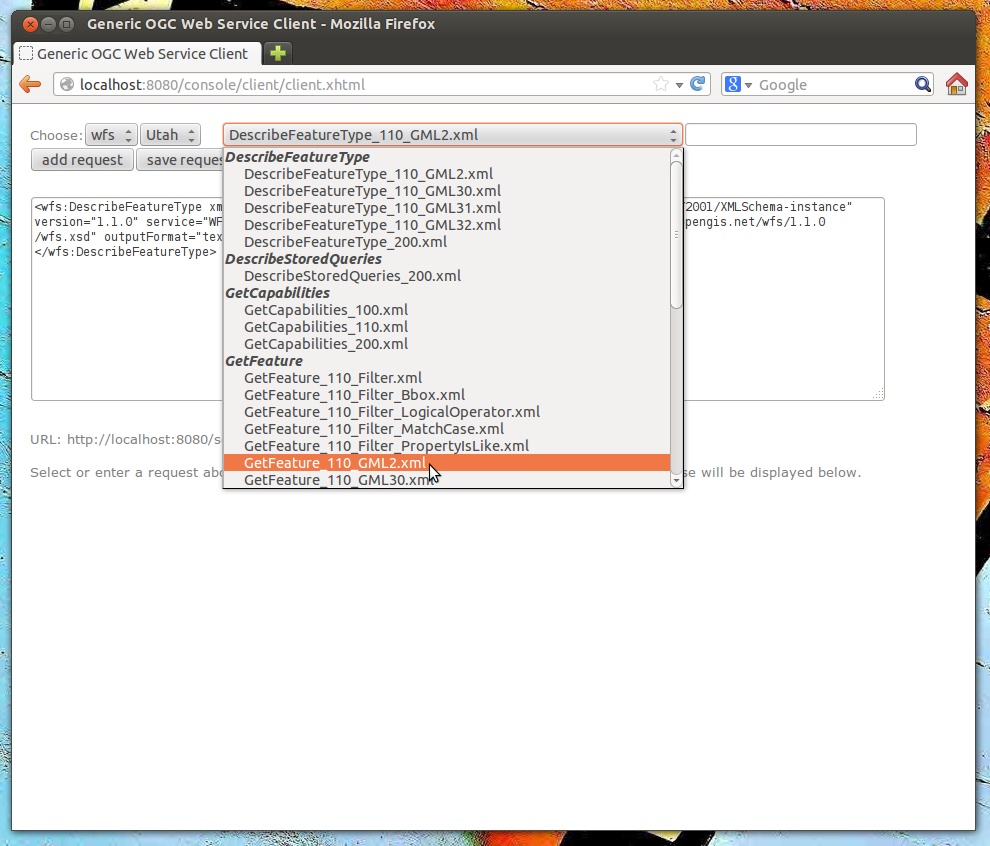
Sending example requests
Select one of the example requests from the third drop-down menu and click Send. The server response will be displayed in the lower section.
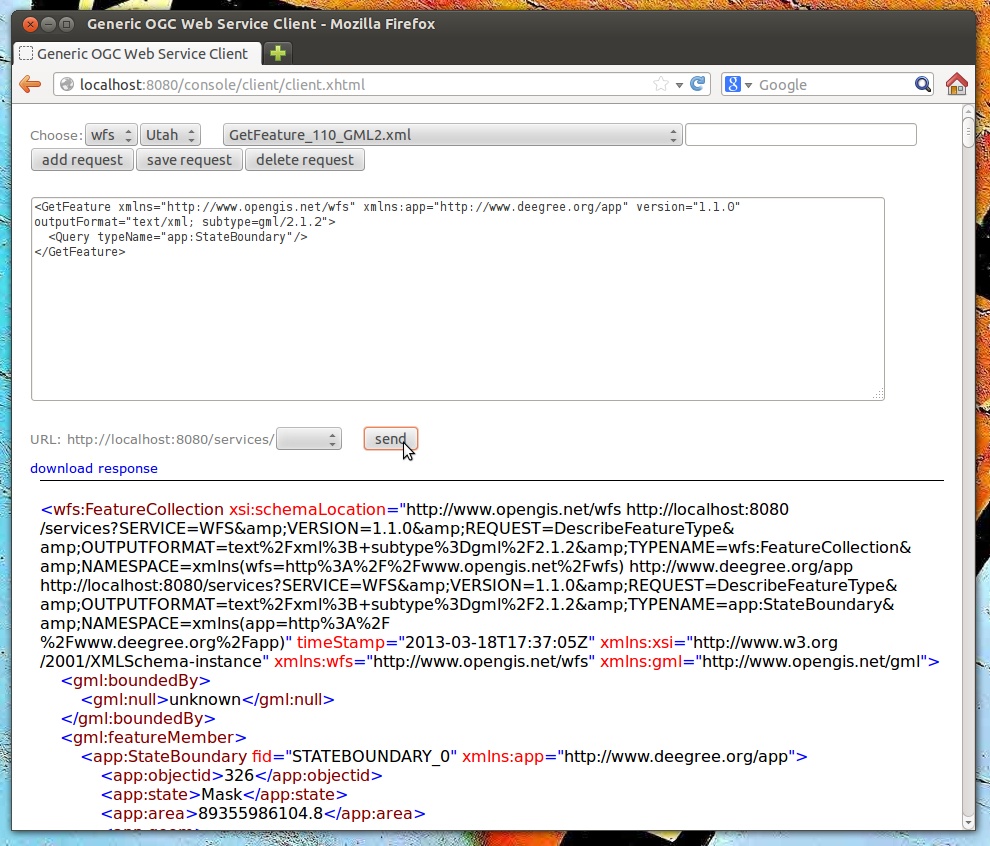
Sending example requests
Tip
WFS request types and their format are specified in the OGC Web Feature Service specification.
Tip
Instead of using the built-in layer preview or the generic OGC client, you may use any compliant OGC client for accessing the WMS and WFS. Successfully tested desktop clients include Quantum GIS (install WFS plugin for accessing WFS), uDig, OpenJUMP and deegree iGeoDesktop. The service address to enter in your client is: http://localhost:8080/services.
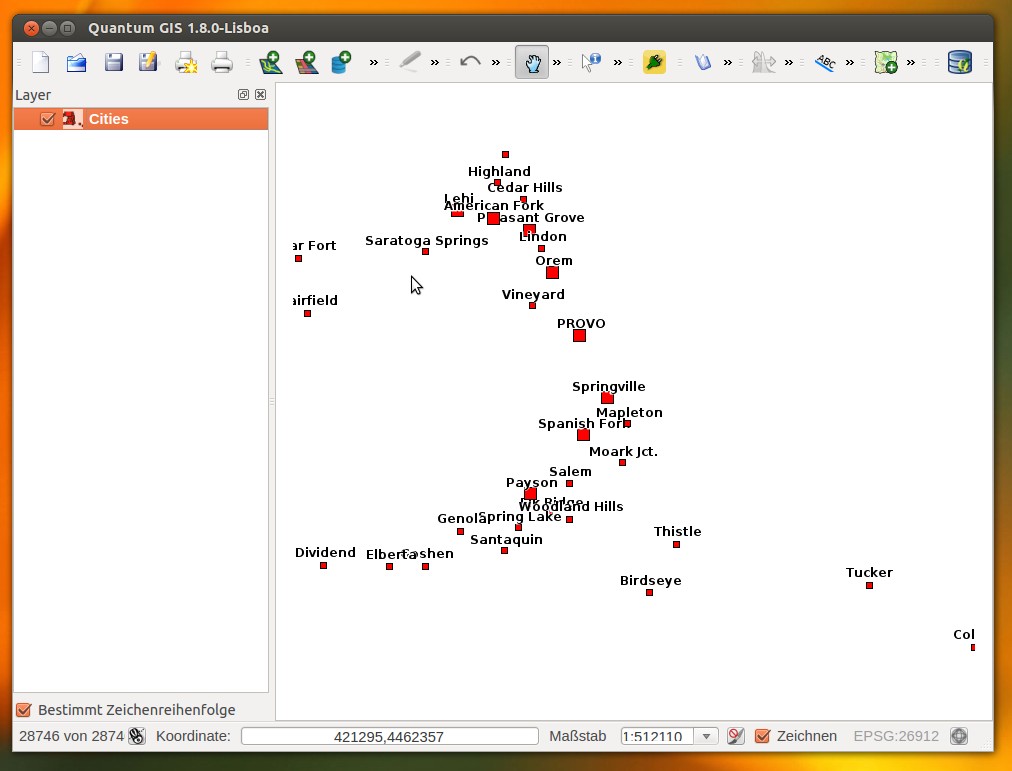
Quantum GIS displaying a WMS layer from the Utah workspace
3.4. Example workspace 3: An ISO Catalogue Service setup
This workspace contains a catalogue service (CSW) setup that complies to the ISO Application Profile. After downloading and starting it, you will have to setup tables in a PostGIS database first. You will need to have an empty and spatially-enabled PostGIS database handy that can be accessed from the machine that runs deegree webservices.
Tip
Instead of PostGIS, you can also use the workspace with an Oracle Spatial or a Microsoft SQL Server database. In order to enable support for these databases, see Adding database modules.
After downloading and starting the workspace, some errors will be indicated (red exclamation marks):
Initial startup of deegree-workspace-csw
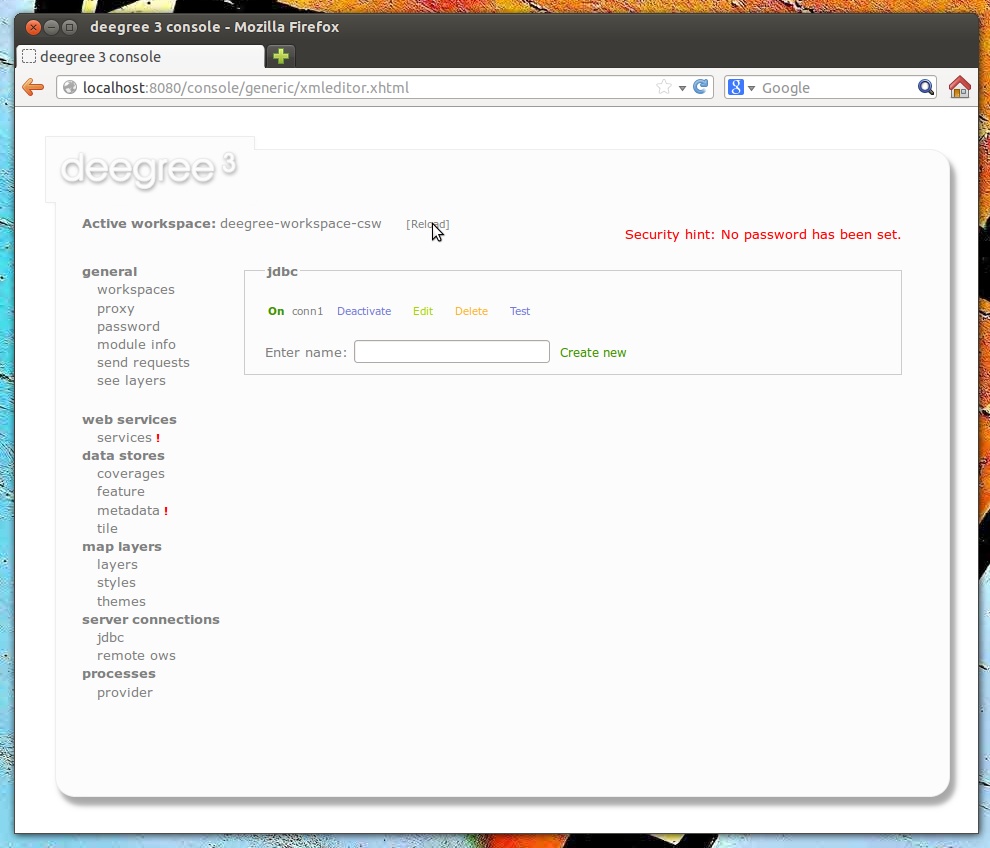
Don’t worry, this is just because we’re missing the correct connection information to connect to our database. We’re going to fix that right away. Click server connections -> jdbc:
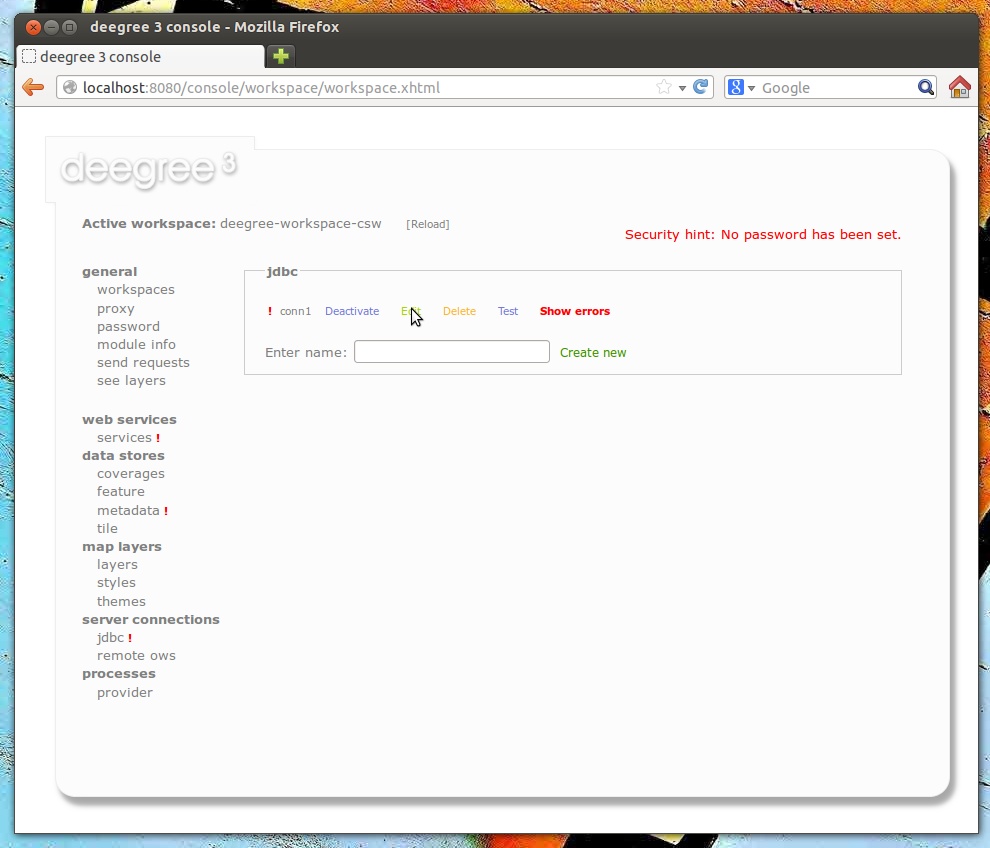
JDBC connection view
Click Edit:
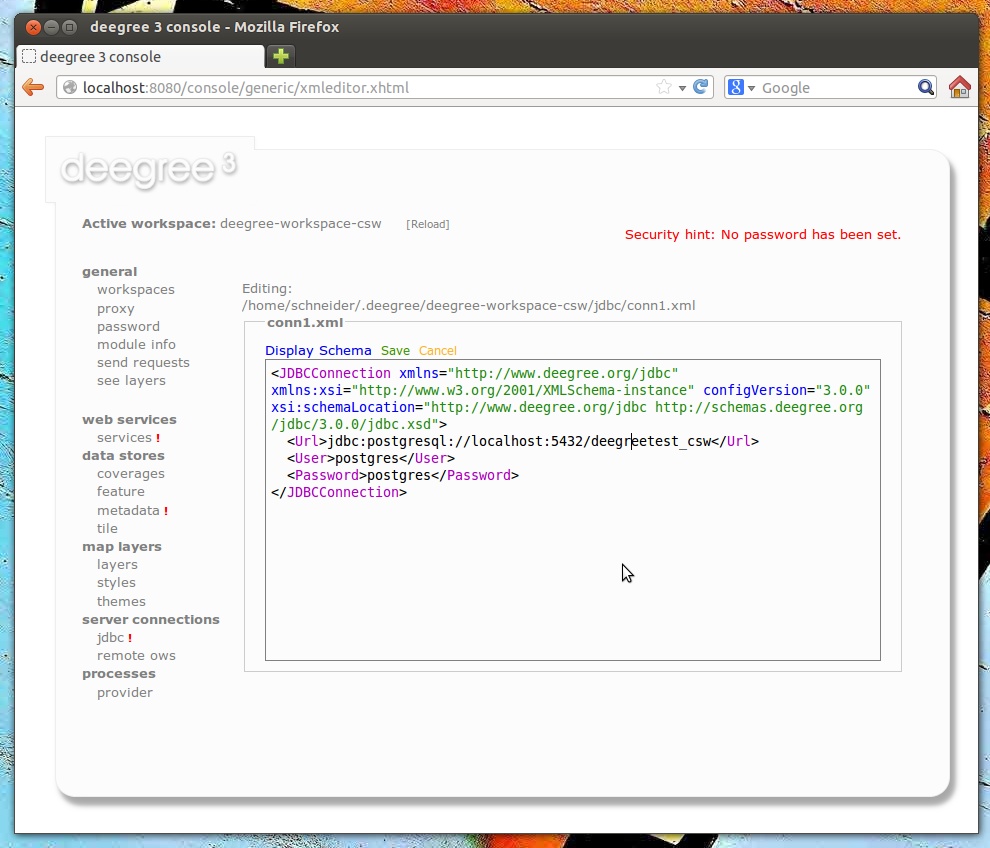
Editing the JDBC resource configuration file
Make sure to enter the correct connection parameters and click Save. You should now have a working connection to your database, and the exclamation mark for conn1 should disappear. Click Reload to force a full reinitialization of the workspace:
Reinitializing the workspace
The indicated problems are gone now, but we still need to create the required database tables. Change to the metadata store view (data stores -> metadata) and click Setup tables:
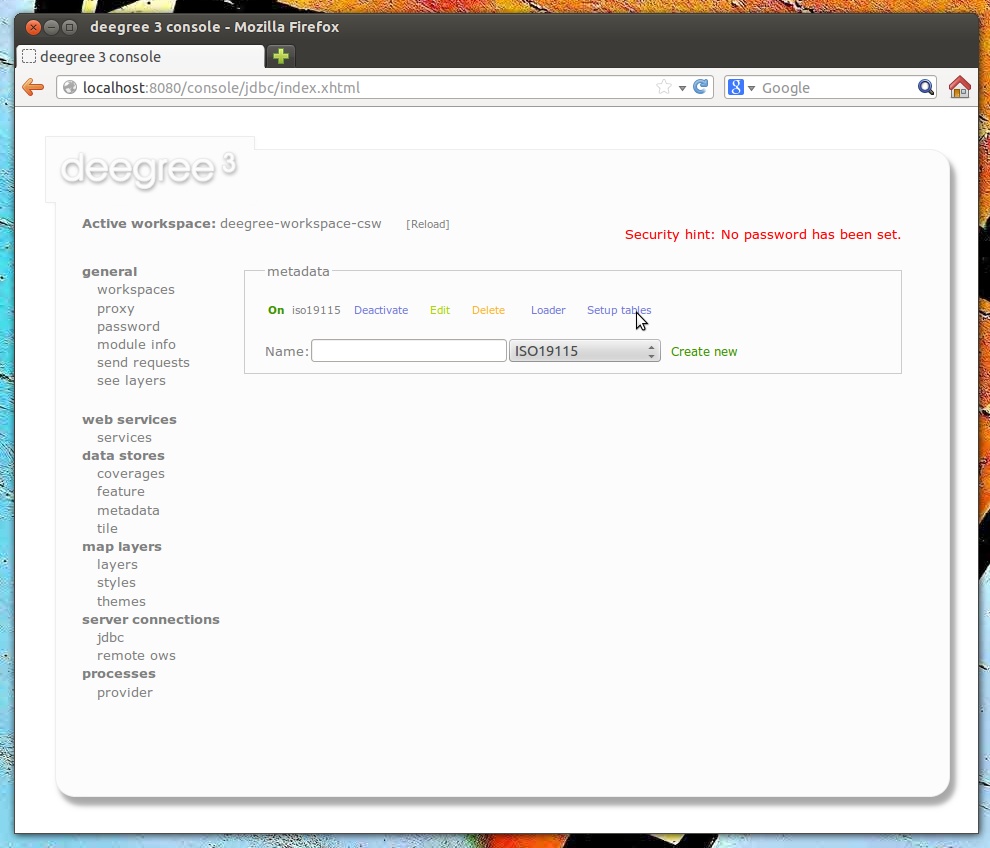
Metadata store view
In the next view, click Execute:
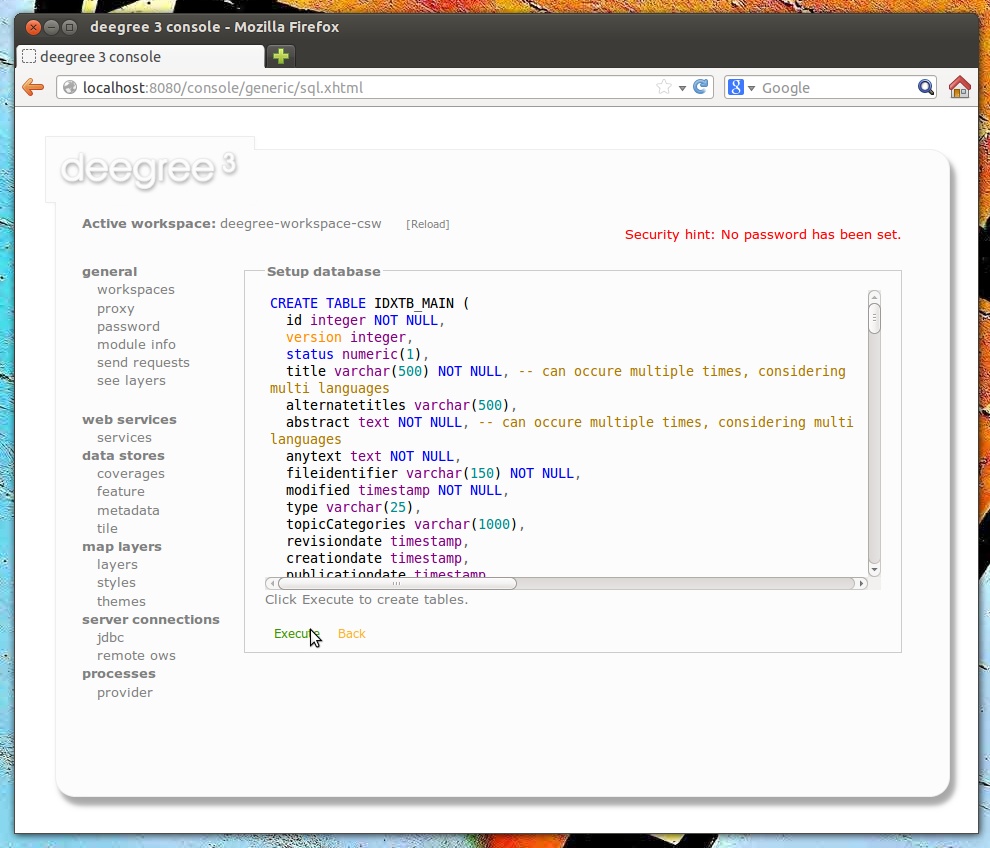
Creating tables for storing ISO metadata records
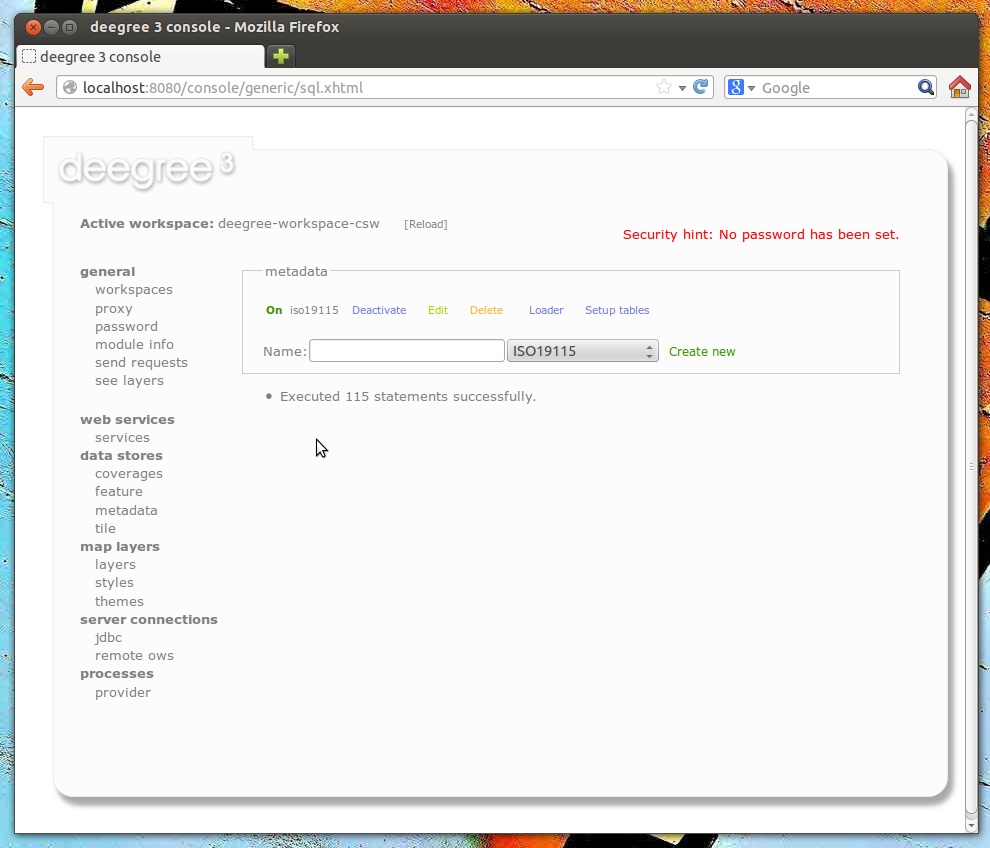
After table creation
If all went well, you should now have a working, but empty CSW setup. You can connect to the CSW with compliant clients or use the send requests link to send raw CSW requests to the service. The workspace comes with some suitable example requests. Use the third drop-down menu to select an example request. Entry complex_insert.xml can be used to insert some ISO example records using a CSW transaction request:
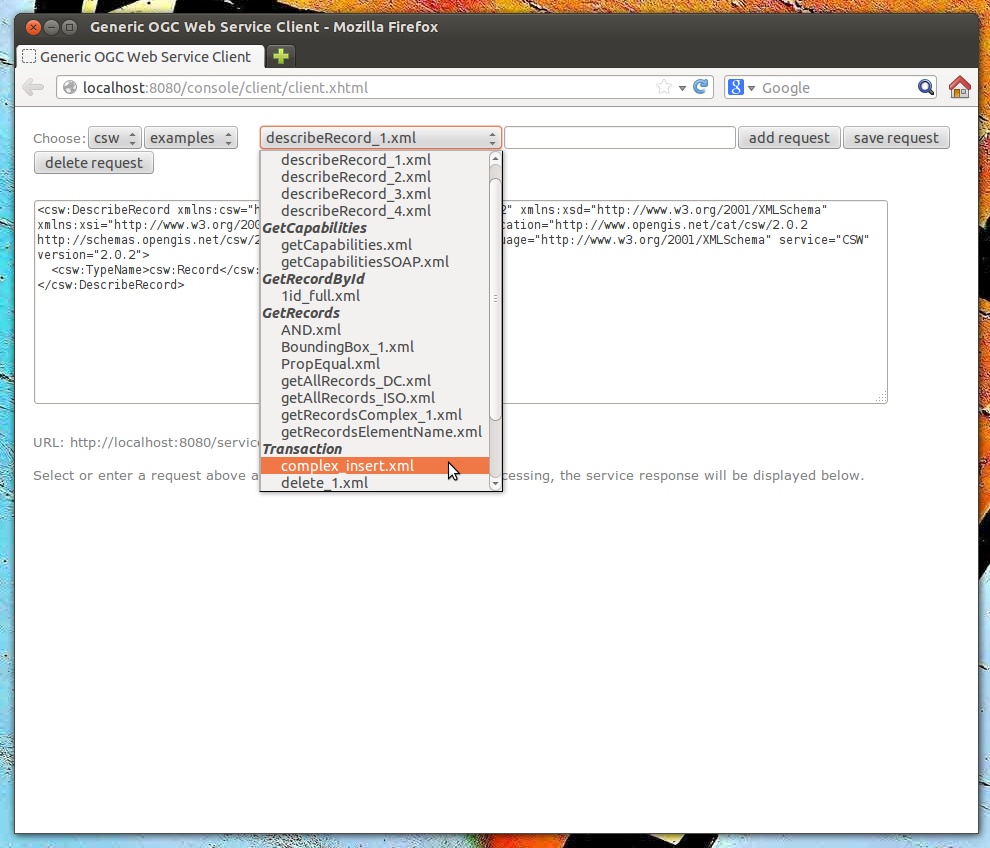
Choosing example requests
Click Send. After successful insertion, some records have been inserted into the CSW (respectively the database). You may want to explore other example requests as well, e.g. for retrieving records:
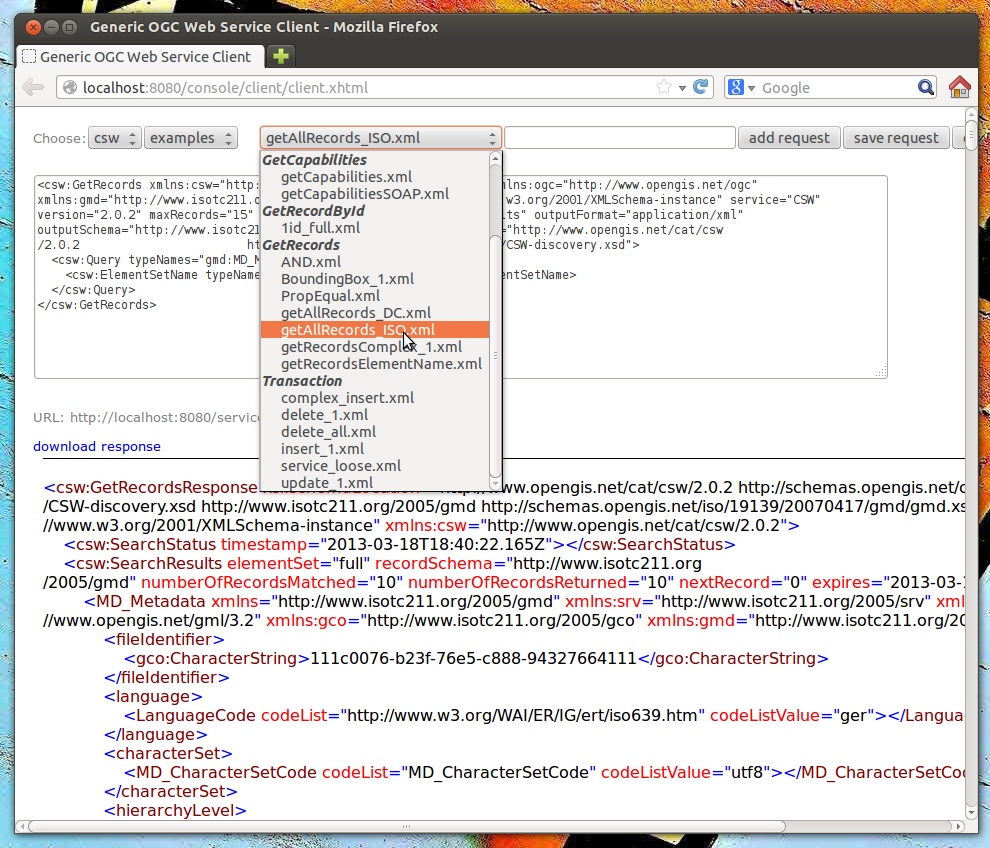
Other example CSW requests
3.5. Example workspace 4: Web Processing Service demo
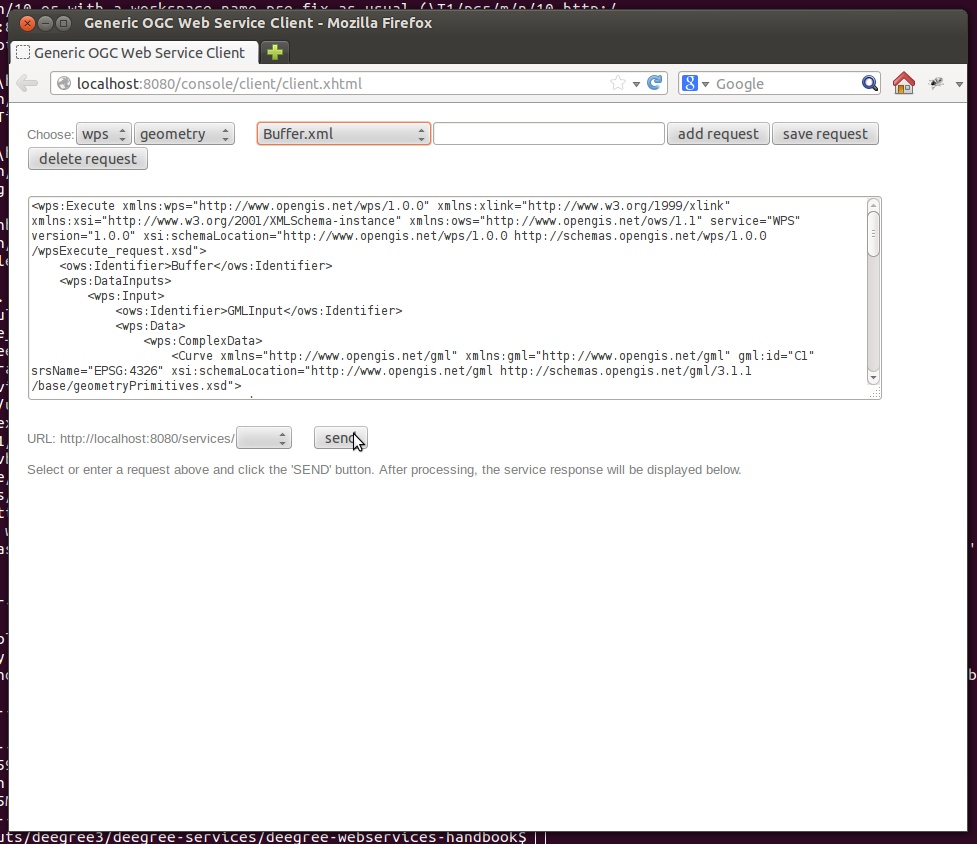
This workspace contains a WPS setup with simple example processes and example requests. It’s a good starting point for learning the WPS protocol and the development of WPS processes. After downloading and starting it, click send requests in order to find example requests that can be sent to the WPS. Use the third drop-down menu to select an example request:
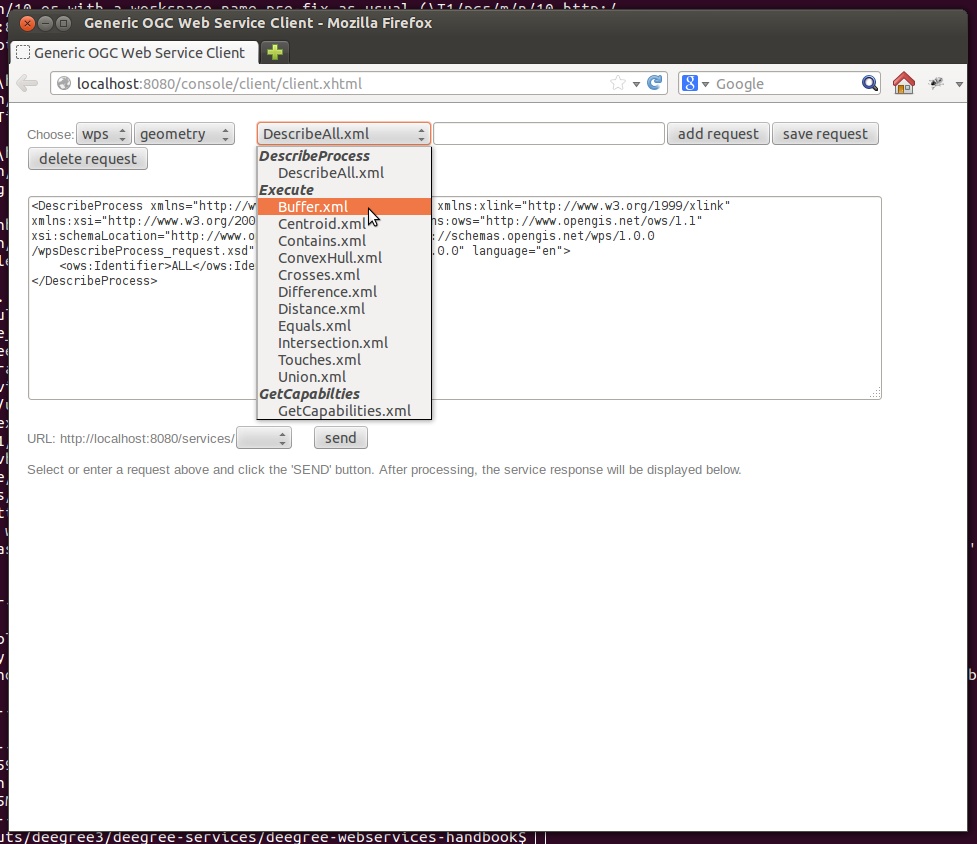
Choosing a WPS example request
Click Send to fire it against the WPS:
Sending an example request against the WPS
The response of the WPS will be displayed in the lower section:
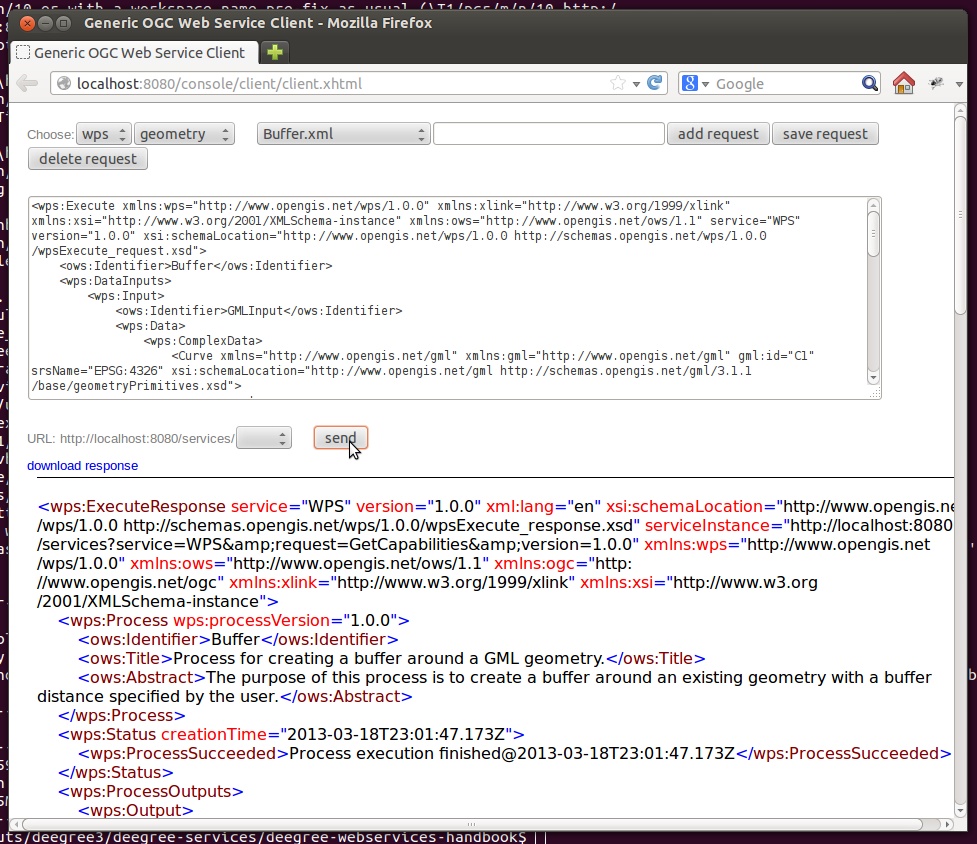
WPS response is displayed
Besides the geometry example processes, the parameter example process and example requests may be interesting to developers who want to learn development of WPS processes with deegree webservices:
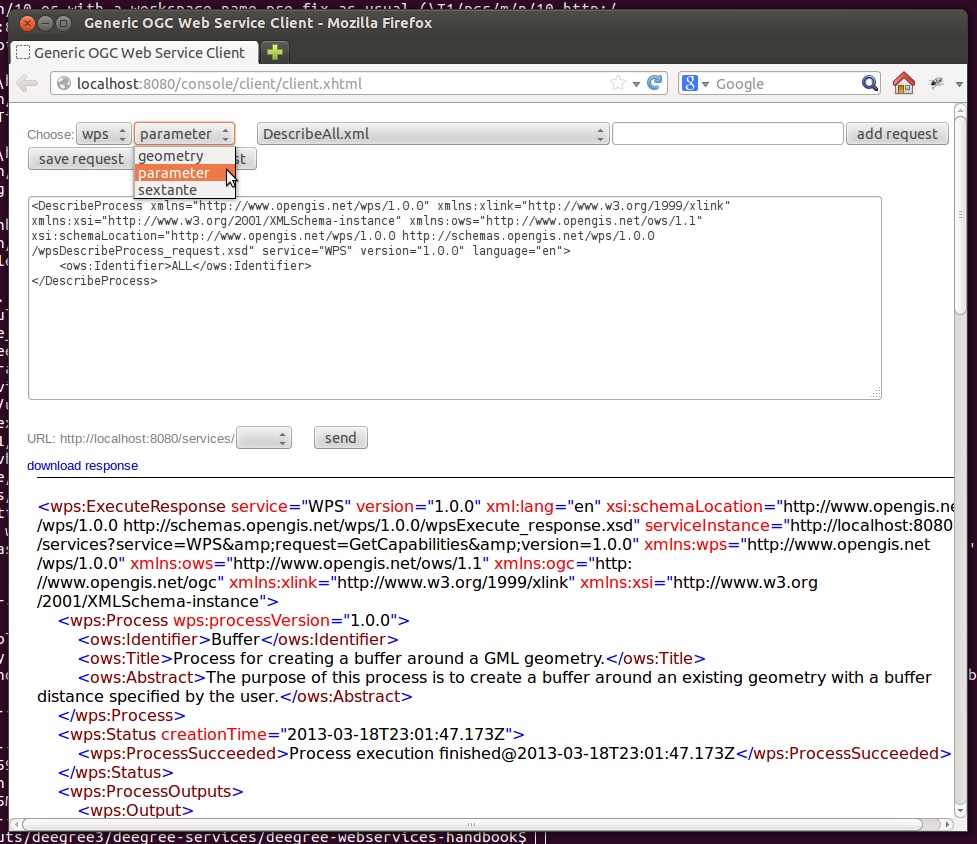
Example requests for the parameter demo process
The process has four input parameters (literal, bounding box, xml and binary) that are simply piped to four corresponding output parameters. There’s practically no process logic, but the included example requests demonstrate many of the possibilities of the WPS protocol:
- Input parameter passing variants (inline vs. by reference)
- Output parameter handling (inline vs. by reference)
- Response variants (ResponseDocument vs. RawData)
- Storing of response documents
- Asynchronous execution
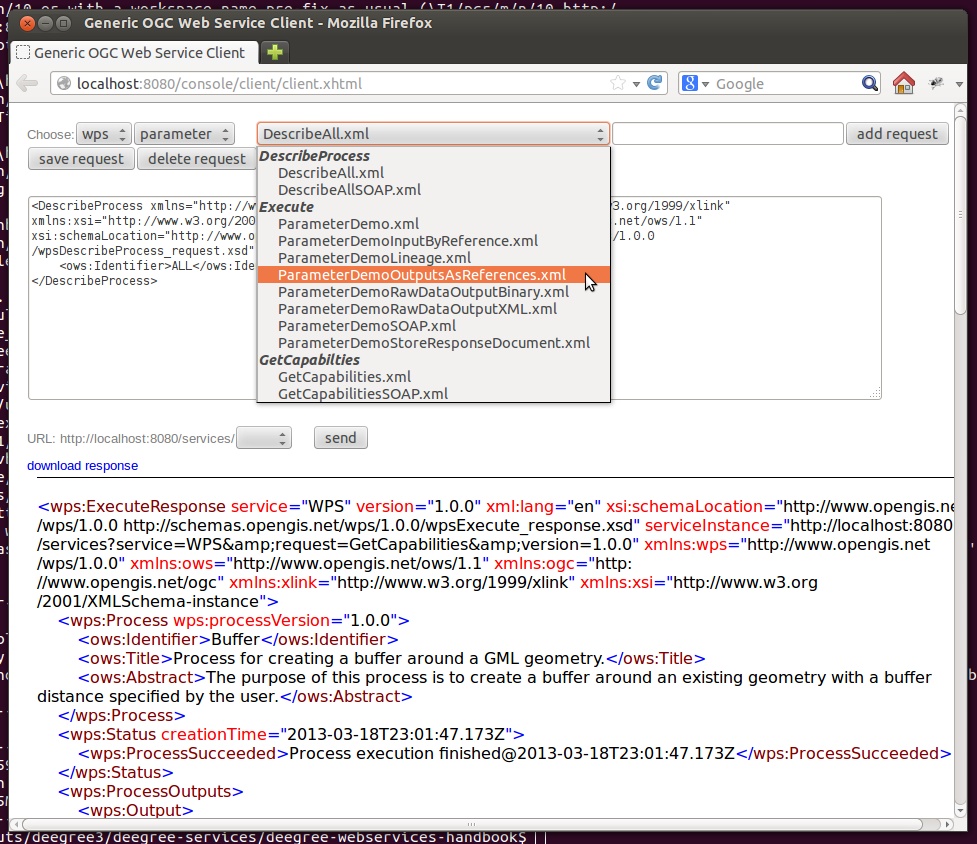
Example requests for the ParameterDemo process
Tip
WPS request types and their format are specified in the OGC Web Processing Service specification.
Tip
In order to add your own processes, see Web Processing Service (WPS) and Process providers.