10. Map layers
A (map) layer defines how to combine a data store and a style resource into a map. Each layer resource can be used to define one or more layers. The layers can be used in theme definitions, and depend on various data source and style resources. This chapter assumes you’ve already configured a data source and a style for your layer (although a style is not strictly needed; some layer types can do without, and others can render in a default style when none is given).
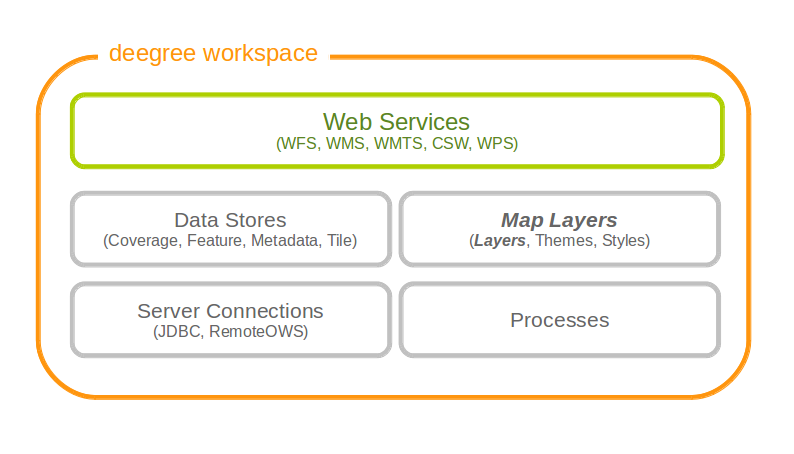
Layer resources define how data store and style resources are combined
10.1. Common configuration
Most layer configurations follow a similar structure. That’s why some of the common components are exactly the same across configurations (they’re even in common namespaces). In this section these common elements are described first, the subsequent chapters describe the different layer types.
10.1.1. Description metadata
The description section is used to describe textual metadata which occurs in almost all objects. This includes elements such as title, abstract and so on. The format which is being described here is capable of multilingualism, but processing multilingual strings is not supported yet (you can still define it, though).
The commonly used prefix for these elements is d. Let’s have a look at an example:
<d:Title>My Roads Layer</d:Title>
<d:Abstract>This is my roads layer, which I configured myself. I had no help but the deegree webservices handbook.</d:Abstract>
<d:Keywords>
  <d:Keyword>deegree</d:Keyword>
  <d:Keyword>transportation</d:Keyword>
  <d:Type codeSpace='none'>unknown</d:Type>
</d:Keywords>
All elements support the lang attribute to specify the language, and all elements may occur multiple times (including the Keywords element).
10.1.2. Spatial metadata
The spatial metadata is used to describe coordinate systems and envelopes. Typically, the layers can retrieve the native coordinate system and envelope from the data source, but sometimes it may be desirable to define a special extent, or add more coordinate systems. In the example configurations, the prefix s is used for spatial metadata elements, so it is used here as well:
<s:Envelope crs='EPSG:25832'>
  <s:LowerCorner>204485 5204122</s:LowerCorner>
  <s:UpperCorner>1008600 6134557</s:UpperCorner>
</s:Envelope>
<s:CRS>EPSG:25832 EPSG:31466 EPSG:4326</s:CRS>
As you can see, the envelope is specified in a specific CRS. If the attribute is omitted, EPSG:4326 is assumed. The CRS element may include multiple codes, separated by whitespace.
10.1.3. Common layer options
This sections describes a set of common layer options. Not all options make sense for all layers, but most of them do.
The namespace for the elements (newly) defined in this section is commonly bound to the l character. Let’s have a look at the options available:
| Option | Cardinality | Value | Description |
|---|---|---|---|
| Name | 1 | String | The unique identifier of the layer |
| Description | 0..1 | Several | The description elements described above |
| Spatial metadata | 0..1 | Several | The spatial metadata elements described above |
| MetadataSetId | 0..1 | String | A metadata set id by which this layer is identified |
| ScaleDenominators | 0..1 | Empty | Used to define scale constraints on the layer |
| Dimension | 0..n | Complex | Used to configure extra dimensions for the layer |
| StyleRef | 0..n | Complex | Used to reference one or more styles |
| LayerOptions | 0..1 | Complex | Used to configure rendering behaviour |
The MetadataSetId is used in the WMS to export a MetadataURL based on a template. Please refer to the WMS configuration for details on how to configure this.
The ScaleDenominators element has min and max attributes which define the constraints in WMS 1.3.0 scale denominators (based on 0.28mm pixel size).
10.1.3.1. Layer dimensions
The WMS specification supports extra dimensions (besides the spatial extent) for layers, such as elevation, time or other custom dimensions. Since the support must be present at the layer level, this must be configured on the layer in deegree. The Dimension element can have the attributes isTime and isElevation to indicate that you’re defining the standard time/elevation dimension. If none is given, you’ll have to specify the Name element. Let’s see what you can configure here:
| Option | Cardinality | Value | Description |
|---|---|---|---|
| Name | 0..1 | String | The dimension name, if not elevation or time |
| Source | 1 | String/QName | The data source of the dimension |
| DefaultValue | 0..1 | String | Specify a default value to be used, default is none |
| MultipleValues | 0..1 | Boolean | Whether multiple values are supported, default is false |
| NearestValue | 0..1 | Boolean | Whether jumping to the nearest value is supported, default is false |
| Current | 0..1 | Boolean | Whether current is supported for time, default is false |
| Units | 0..1 | String | What units this dimension uses. Mandatory for non time/elevation |
| UnitSymbol | 0..1 | String | What unit symbol to use. Mandatory for non time/elevation |
| Extent | 1 | String | The extent of the dimension |
Please note that for feature layers, the Source element content must be a qualified property name.
To understand how the omission or specification of the various optional elements here affect the WMS protocol behaviour, it is recommended to read up on the WMS 1.3.0 specification. The deegree WMS is going to behave according to what the spec says it must do (what to do in case a default value is available or not etc.). The format for the values and the extent is also identical to that used for requests/in the spec.
10.1.3.2. Layer styles
You can configure any number of StyleRef elements. Each corresponds to exactly one style store configuration, specified by the subelement StyleStoreId. The only other allowed subelement is the Style element, which can be used to extract/rename specific styles from the style store. If omitted, all styles matching the layers’ name are used. Let’s have a look at an example snippet:
<l:StyleRef>
  <l:StyleStoreId>roads_style</l:StyleStoreId>
</l:StyleRef>
Here’s a snippet with Style elements:
PLEASE NOTE: The following mechanisms using StyleName LayerNameRef and StyleNameRef elements will only work with SLD files. Using direct SE styles, the only way to configure styles is the above.
<l:StyleRef>
  <l:StyleStoreId>road_styles</l:StyleStoreId>
  <l:Style>
  ...
  </l:Style>
  <l:Style>
  ...
  </l:Style>
</l:StyleRef>
If a Style element is specified, you must first specify what style you want extracted:
<l:Style>
  <l:StyleName>highways</l:StyleName>
  <l:LayerNameRef>highways</l:LayerNameRef>
  <l:StyleNameRef>highways</l:StyleNameRef>
  ...
</l:Style>
The StyleName specifies the name under which the style will be known in the WMS. The LayerNameRef and StyleNameRef are used to extract the style from the style store.
The next part to configure within the Style element is the legend generation, if you don’t want to use the default legend generated from the rendering style. You can either specify a different style from the style store to use for legend generation, or you can specify an external graphic. Referencing a different legend style is straightforward:
<l:Style>
...
  <l:LegendStyle>
    <l:LayerNameRef>highways</l:LayerNameRef>
    <l:StyleNameRef>highways_legend</l:StyleNameRef>
  </l:LegendStyle>
</l:Style>
With specifying the external graphic, you have the option of referencing a local file, or referencing a remote URL. Specifying a file is straightforward, and will result in the contents of that file being used as legend:
<l:Style>
...
  <l:LegendGraphic>legendimages/mylegend.png</l:LegendGraphic>
</l:Style>
If you specify an HTTP URL instead of a relative path the behaviour is the same by default, the remote images’ content is used as legend. If you set the optional attribute outputGetLegendGraphicUrl to false (it’s true by default), the specified URL is written as LegendURL in the WMS capabilities (the behaviour for GetLegendGraphic requests is the same anyway):
<l:Style>
...
  <l:LegendGraphic outputGetLegendGraphicUrl="false">http://legends.acme.com/menu.png</l:LegendGraphic>
</l:Style>
A full example you will find below:
<l:StyleRef>
<l:StyleStoreId>road_styles</l:StyleStoreId>
  <l:Style>
    <l:StyleName>highways</l:StyleName>
    <l:LayerNameRef>highways</l:LayerNameRef>
    <l:StyleNameRef>highways</l:StyleNameRef>
    <l:LegendGraphic outputGetLegendGraphicUrl="false">http://legends.acme.com/menu.png</l:LegendGraphic>
  </l:Style>
  <l:Style>
    <l:LegendStyle>
      <l:LayerNameRef>highways</l:LayerNameRef>
      <l:StyleNameRef>highways_legend</l:StyleNameRef>
    </l:LegendStyle>
  </l:Style>
</l:StyleRef>
10.1.3.3. Rendering options
The rendering options are basically the same as the WMS layer options. Here’s a copy of the corresponding table for reference:
| Option | Cardinality | String | Description |
|---|---|---|---|
| AntiAliasing | 0..1 | String | Whether to antialias NONE, TEXT, IMAGE or BOTH, default is BOTH |
| RenderingQuality | 0..1 | String | Whether to render LOW, NORMAL or HIGH quality, default is HIGH |
| Interpolation | 0..1 | String | Whether to use BILINEAR, NEAREST_NEIGHBOUR or BICUBIC interpolation, default is NEAREST_NEIGHBOUR |
| MaxFeatures | 0..1 | Integer | Maximum number of features to render at once, default is 10000 |
| FeatureInfo | 0..1 | None | attribute enabled: if false, feature info is disabled (default is true) |
| FeatureInfo | 0..1 | None | attribute pixelRadius: Number of pixels to consider when doing GetFeatureInfo, default is 1 |
Here is an example snippet:
<l:LayerOptions>
  <l:AntiAliasing>TEXT</l:AntiAliasing>
</l:LayerOptions>
10.2. Feature layers
Feature layers are layers based on a feature store. You can have multiple layers defined in a feature layers configuration, each based on feature types from the same feature store.
You have two choices to configure feature layers. One option is to try to have deegree figure out what layers to configure by itself, the other is to manually define all the layers you want. Having deegree do the configuration automatically has the obvious advantage that the configuration is minimal, with the disadvantage of lacking flexibility.
10.2.1. Auto layers
This configuration only involves to specify what feature store to use, and optionally, what styles. Let’s have a look at an example:
<FeatureLayers xmlns='http://www.deegree.org/layers/feature'
               xmlns:d='http://www.deegree.org/metadata/description'
               xmlns:s='http://www.deegree.org/metadata/spatial'
               xmlns:l='http://www.deegree.org/layers/base'
               configVersion='3.2.0'>

  <AutoLayers>
    <FeatureStoreId>myfeaturestore</FeatureStoreId>
    <StyleStoreId>style1</StyleStoreId>
    <StyleStoreId>style2</StyleStoreId>
  </AutoLayers>

</FeatureLayers>
This will create one layer for each (concrete) feature type in the feature store. If no style stores are configured, the default style will be used for all layers. If style stores are configured, matching styles will be automatically used if available. So if you have a feature type with (local) name Autos, deegree will check all configured style stores for styles identified by layer name Autos and use them, if available. The name Autos will be used as name and title as appropriate, and spatial metadata will be used as available from the feature store.
10.2.2. Manual configuration
The basic structure of a manual configuration looks like this:
<FeatureLayers xmlns='http://www.deegree.org/layers/feature'
               xmlns:d='http://www.deegree.org/metadata/description'
               xmlns:s='http://www.deegree.org/metadata/spatial'
               xmlns:l='http://www.deegree.org/layers/base'
               configVersion='3.2.0'>
  <FeatureStoreId>myfeaturestore</FeatureStoreId>
  <FeatureLayer>
  ...
  </FeatureLayer>
  <FeatureLayer>
  ...
  </FeatureLayer>
</FeatureLayers>
As you can see, the first thing to do is to bind the configuration to a feature store. After that, you can define one or more feature layers.
A feature layer configuration has three optional elements besides the common elements. The FeatureType can be used to restrict a layer to a specific feature type (use a qualified name). The Filter element can be used to specify a filter that applies to the layer globally (use standard OGC filter encoding 1.1.0 ogc:Filter element within):
<FeatureLayer>
  <FeatureType xmlns:app='http://www.deegree.org/app'>app:Roads</FeatureType>
  <Filter>
    <Filter xmlns='http://www.opengis.net/ogc'>
      <PropertyIsEqualTo>
        <PropertyName xmlns:app='http://www.deegree.org/app'>app:type</PropertyName>
        <Literal>123</Literal>
      </PropertyIsEqualTo>
    </Filter>
  </Filter>
  ...
</FeatureLayer>
The third extra option is the SortBy element, which can be used to influence the order in which features are drawn:
<FeatureLayer>
  ...
  <SortBy reverseFeatureInfo="false">
    <SortBy xmlns="http://www.opengis.net/ogc">
      <SortProperty>
        <PropertyName xmlns:app="http://www.deegree.org/app">app:level</PropertyName>
      </SortProperty>
    </SortBy>
  </SortBy>
  ...
</FeatureLayer>
The attribute reverseFeatureInfo is false by default. If set to true, the feature that is drawn first will appear last in a GetFeatureInfo feature collection.
After that the standard options follow, as outlined in the common section.
10.3. Tile layers
Tile layers are based on tile data sets. You can configure an unlimited number of tile layers each based on several different tile data sets within one configuration file.
As you might have guessed, most of the common parameters are ignored for this layer type. Most notably, the style and dimension configuration is ignored.
In most cases, a configuration like the following is sufficient:
<TileLayers xmlns="http://www.deegree.org/layers/tile"
            xmlns:d="http://www.deegree.org/metadata/description"
            xmlns:l="http://www.deegree.org/layers/base"
            configVersion="3.4.0">
  <TileLayer>
    <l:Name>example</l:Name>
    <d:Title>Example INSPIRE layer</d:Title>
    <TileDataSet tileStoreId="sometilestore">roads</TileDataSet>
    <TileDataSet tileStoreId="sometilestore4326">roads</TileDataSet>
  </TileLayer>
</TileLayers>
Just repeat the TileLayer element once for each layer you wish to configure.
Please note that each tile data set needs to be configured with a unique tile matrix set within one layer. It is currently not possible (let’s say it’s not advisable) to configure two tile data sets based on the same tile matrix set within one layer, even if their actual data does not overlap.
If used in a WMTS, the WMTS capabilities will contain only the actually used tile matrix sets, and will contain appropriate links in the layers which have been configured with fitting tile data sets.
10.4. Coverage layers
Coverage layers are based on coverages out of coverage stores. Similar to feature layers, you can choose between an automatic layer setup and a manual configuration.
10.4.1. Auto layers
All you need to configure is the coverage store and an optional style store:
<CoverageLayers xmlns="http://www.deegree.org/layers/coverage"
                xmlns:d="http://www.deegree.org/metadata/description"
                xmlns:l="http://www.deegree.org/layers/base"
                configVersion="3.4.0">
  <AutoLayers>
    <CoverageStoreId>dem</CoverageStoreId>
    <StyleStoreId>heightmap</StyleStoreId>
  </AutoLayers>
</CoverageLayers>
In theory this would add one layer for each coverage in the coverage store, but since only one coverage is supported per coverage store at the moment, only one layer will be the result. If a style store is specified, all styles matching the layer name (the coverage store id) will be available for the layer.
10.4.2. Manual configuration
The manual configuration requires the definition of a coverage store, and one or many coverage layer definitions:
<CoverageLayers xmlns="http://www.deegree.org/layers/coverage"
                xmlns:d="http://www.deegree.org/metadata/description"
                xmlns:l="http://www.deegree.org/layers/base"
                configVersion="3.4.0">
  <CoverageStoreId>dem</CoverageStoreId>
  <CoverageLayer>
  <!-- standard layer options -->
  </CoverageLayer>
</CoverageLayers>
Within the CoverageLayer element you can only define the common layer options. While only one coverage is supported per coverage store, it might still be desirable to define multiple layers based on the store, for example one layer per style.
10.5. Remote WMS layers
Remote WMS layers are based on layers requested from another WMS on the network. In its simplest mode, the remote WMS layer store will provide all layers that the other WMS offers, but you can pick out and restrict the configuration to single layers if you want. The common style and dimension options are not used in this layer configuration.
The remote WMS layer configuration is always based on a single RemoteWMS resource, so the most basic configuration which cascades all available layers looks like this:
<RemoteWMSLayers xmlns="http://www.deegree.org/layers/remotewms" configVersion="3.4.0">
  <RemoteWMSId>d3</RemoteWMSId>
  <!-- more detailed options would follow here -->
</RemoteWMSLayers>
In many cases that’s already sufficient, but if you wish to control the way the requests are being sent, you can specify the RequestOptions. If you want to limit/restrict the layers, you can specify any amount of Layer elements.
10.5.1. Request options
Use the ImageFormat element to indicate which format should be requested from the remote WMS. Set the attribute transparent to false if you don’t want to request transparent images. Default is to request transparent image/png maps:
<RequestOptions>
  <ImageFormat transparent='false'>image/gif</ImageFormat>
</RequestOptions>
The DefaultCRS element can be used to specify the CRS to request. If the useAlways attribute is true, maps are always requested in this format, and transformed if necessary. If set to false (the default), the requested CRS will be requested from the remote service if available. If a requested CRS is not available from the remote service, the value of this option is used, and the resulting image transformed.
The Parameter element can be used (multiple times) to add and/or fix KVP parameter values used in requests to the remote service. The name attribute (which is required) configures which parameter you’re talking about, and the content specifies a default or fixed value. The use and scope attributes can be used to specify how to handle parameters. Have a look at the following table for default and possible values of these attributes:
| Name | Default | Possible values |
|---|---|---|
| use | allowOverride | allowOverride, fixed |
| scope | All | GetMap, GetFeatureInfo, All |
Let’s have a look at a couple of examples:
<RequestOptions>
  <Parameter name='BGCOLOR'>#00ff00</Parameter>
<RequestOptions>
This means that all maps are requested with a background color of green, unless the request overrides it. GetFeatureInfo requests will also have the BGCOLOR parameter set, although it makes no difference there.
Another example:
<RequestOptions>
  <Parameter name='USERNAME'>SEC_ADMIN</Parameter>
  <Parameter name='PASSWORD'>JOSE67</Parameter>
</RequestOptions>
In this case all requests will have USERNAME and PASSWORD set to these values. Users can still override these values in requests.
A last example:
<RequestOptions>
  <Parameter scope='GetMap' name='BGCOLOR'>#00ff00</Parameter>
  <Parameter use='fixed' name='USERNAME'>SEC_ADMIN</Parameter>
  <Parameter use='fixed' name='PASSWORD'>JOSE67</Parameter>
</RequestOptions>
Now all GetMap requests will have the USERNAME and PASSWORD parameters hard coded to the configured values, with the BGCOLOR parameter set to green by default, but with the possibility of override by the user. GetFeatureInfo requests will only have the USERNAME and PASSWORD parameters fixed to the configured values.
10.5.2. Layer configuration
The manual configuration allows you to pick out a layer, rename it, and optionally override the _common description and spatial metadata. What you don’t override, will be copied from the source. Let’s look at an example:
<RemoteWMSLayers>
  ...
  <Layer>
    <OriginalName>cite:BasicPolygons</OriginalName>
    <Name>basic_polygons</Name>
    <!-- optionally override description (title, abstract, keywords) -->
    <!-- optionally override envelope, crs -->
    <!-- optionally set layer options -->
  </Layer>
</RemoteWMSLayers>
Please note that once you specify one layer, you’ll need to specify each layer you want to make available. If you want all layers to be available, don’t specify a Layer element. Of course, you can specify as many Layer elements as you like.